In mobile applications a lot of data needs to be shown in form of a listview which will consume more data and can cause problem in populating view in some cases so for this cause Android RecyclerView is introduced we will learn more from Android Tutorial on Android Recyclerview.
Generally from the word itself we can understand that recycle means reusing of the same view many times, listview does the same but in additional here every time data is recycled and loaded so that additional data is not required in this typr of scenario.
Android Recyclerview :
Using RecyclerView is much advised as it will use the resources accordingly as needed and will work smoothly.so this can be a small intro regarding what we are going to do in this tutorial and what’s the purpose of it.
Before going any further we require few files to be added to gradle dependencies to go with android recyclerview they are
Dependency :
Add required dependency’s also make sure to check for the latest versions to avoid abnormal crashes using depreciated code.
compile 'com.android.support:support-v4:23.1.1'
compile 'com.android.support:recyclerview-v7:23.1.1'
Here i am using a RecyclerView to generate a listview this
<android.support.v7.widget.RecyclerView
    android:id="@+id/recycler_view"
    android:layout_width="match_parent"
    android:layout_height="match_parent" />
this recycle view will help in recreating view every time so instead of regular listview we use this recyclerview.
activity_main.xml
Including the above recycler view in xml file
<?xml version="1.0" encoding="utf-8"?>

<LinearLayout xmlns:android="http://schemas.android.com/apk/res/android"
    xmlns:tools="http://schemas.android.com/tools"
    android:layout_width="match_parent"
    android:layout_height="match_parent"
    android:orientation="vertical">


    <android.support.v7.widget.RecyclerView
        android:id="@+id/recycler_view"
        android:layout_width="match_parent"
        android:layout_height="match_parent" />


</LinearLayout>
Then according to the above recyclerview we will design a listview type row as
list_item.xml
Creating a list_item in this style as below where we are adding two textviews and imageview. 
<?xml version="1.0" encoding="utf-8"?>

<LinearLayout xmlns:android="http://schemas.android.com/apk/res/android"
    xmlns:card_view="http://schemas.android.com/apk/res-auto"
    android:layout_width="match_parent"
    android:layout_height="match_parent"
    android:orientation="vertical">

        <LinearLayout
            android:id="@+id/top_layout"
            android:layout_width="match_parent"
            android:orientation="horizontal"
            android:layout_height="wrap_content"
            android:weightSum="3">

            <ImageView
                android:id="@+id/imgview"
                android:layout_width="match_parent"
                android:layout_height="match_parent"
                android:layout_weight="2"/>

            <LinearLayout
                android:layout_width="match_parent"
                android:layout_height="wrap_content"
                android:orientation="vertical">


            <TextView
                android:id="@+id/nametext"
                android:layout_width="wrap_content"
                android:layout_height="wrap_content"
                android:text="Name"
                android:layout_marginLeft="10dp"
                android:padding="10dp"
                android:textColor="#000000"
                android:textSize="20dp" />

            <TextView
                android:id="@+id/categorytext"
                android:layout_width="wrap_content"
                android:layout_height="wrap_content"
                android:text="Category"
                android:layout_marginLeft="10dp"
                android:padding="10dp"
                android:textColor="#0f0f0f"
                android:textSize="16dp" />

                </LinearLayout>

        </LinearLayout>

    <TextView
        android:layout_width="match_parent"
        android:layout_height="0.3dp"
        android:background="#000000"
        android:layout_marginTop="5dp"
        android:layout_marginBottom="5dp"
        android:layout_marginLeft="30dp"
        android:layout_marginRight="30dp"/>

</LinearLayout>
So the designing of the listview using recyclerview is completed then we will focus on data to be passed and processed in the listview
MainActivity.java
Here we are adding three ArrayList to assign data to listview as
Name = new ArrayList<>(Arrays.asList("Tomatoes", "Bananas ", "Potatoes", "Pizza", "Carrots", "Ice Cream", "Orange", "Peas"));

Category = new ArrayList<>(Arrays.asList("Vegetables", "Fruits ", "Vegetables", "Baked", "Vegetables", "Dairy", "Fruits", "Vegetables"));
and then images as
Image = new ArrayList<>(Arrays.asList(R.drawable.tomatoes, R.drawable.bananas, R.drawable.potatoes, R.drawable.pizza, R.drawable.carrots, R.drawable.icecream, R.drawable.orange, R.drawable.peas));
Then we will be initializing recyclerview which we have declared in activity_main.xml
mRecyclerView = (RecyclerView) findViewById(R.id.recycler_view);
mRecyclerView.setHasFixedSize(true);

mLayoutManager = new LinearLayoutManager(this);
mRecyclerView.setLayoutManager(mLayoutManager);
Then setting up it with adapter
mAdapter = new ListAdapter(MainActivity.this, Name, Category, Image);
mRecyclerView.setAdapter(mAdapter);
MainActivity:
Providing the Full Code for Android Recyclerview implementation.
package listview.androidcoding.abhishek.recyclerviewlistview;

import android.app.Activity;
import android.os.Bundle;
import android.support.v7.widget.LinearLayoutManager;
import android.support.v7.widget.RecyclerView;

import java.util.ArrayList;
import java.util.Arrays;

public class MainActivity extends Activity {

    RecyclerView mRecyclerView;
    RecyclerView.LayoutManager mLayoutManager;
    RecyclerView.Adapter mAdapter;
    ArrayList<String> Name;
    ArrayList<String> Category;
    ArrayList<Integer> Image;

    @Override
    protected void onCreate(Bundle savedInstanceState) {
        super.onCreate(savedInstanceState);
        setContentView(R.layout.activity_main);

        Name = new ArrayList<>(Arrays.asList("Tomatoes", "Bananas ", "Potatoes", "Pizza", "Carrots", "Ice Cream", "Orange", "Peas"));
        Category = new ArrayList<>(Arrays.asList("Vegetables", "Fruits ", "Vegetables", "Baked", "Vegetables", "Dairy", "Fruits", "Vegetables"));
        Image = new ArrayList<>(Arrays.asList(R.drawable.tomatoes, R.drawable.bananas, R.drawable.potatoes, R.drawable.pizza, R.drawable.carrots, R.drawable.icecream, R.drawable.orange, R.drawable.peas));


        mRecyclerView = (RecyclerView) findViewById(R.id.recycler_view);
        mRecyclerView.setHasFixedSize(true);

        mLayoutManager = new LinearLayoutManager(this);
        mRecyclerView.setLayoutManager(mLayoutManager);

        mAdapter = new ListAdapter(MainActivity.this, Name, Category, Image);
        mRecyclerView.setAdapter(mAdapter);

    }

}
Then creating ListAdapter which will be using recycleview to process a listview
ListAdapter
package listview.androidcoding.abhishek.recyclerviewlistview;


import android.content.Context;
import android.support.v7.widget.RecyclerView;
import android.view.LayoutInflater;
import android.view.View;
import android.view.ViewGroup;
import android.widget.ImageView;
import android.widget.TextView;

import java.util.ArrayList;

public class ListAdapter extends RecyclerView.Adapter<ListAdapter.ViewHolder> {

    ArrayList<String> Name;
    ArrayList<String> Category;
    ArrayList<Integer> Image;
    Context context;

    public ListAdapter(Context context, ArrayList<String> Name, ArrayList<String> Category, ArrayList<Integer> Image) {
        super();
        this.context = context;
        this.Name = Name;
        this.Category = Category;
        this.Image = Image;
    }

    @Override
    public ViewHolder onCreateViewHolder(ViewGroup viewGroup, int i) {
        View v = LayoutInflater.from(viewGroup.getContext())
                .inflate(R.layout.list_item, viewGroup, false);
        ViewHolder viewHolder = new ViewHolder(v);
        return viewHolder;
    }

    @Override
    public void onBindViewHolder(ViewHolder viewHolder, int i) {
        viewHolder.nametext.setText(Name.get(i));
        viewHolder.categorytext.setText(Category.get(i));
        viewHolder.imgview.setImageResource(Image.get(i));


    }

    @Override
    public int getItemCount() {
        return Name.size();
    }

    public static class ViewHolder extends RecyclerView.ViewHolder {

        public ImageView imgview;
        public TextView nametext;
        public TextView categorytext;


        public ViewHolder(View itemView) {
            super(itemView);
            imgview = (ImageView) itemView.findViewById(R.id.imgview);
            nametext = (TextView) itemView.findViewById(R.id.nametext);
            categorytext = (TextView) itemView.findViewById(R.id.categorytext);

        }


    }


}
So here we are done with this android recyclerview tutorial and if you have any queries can ask below.
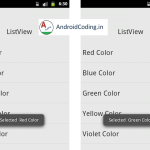
Android Recyclerview Output :
The screen below depicts the implementation of Android Recyclerview tutorial.


If you have any query’s in the tutorial on Android Recyclerview let us know in the comment section below.
If you like this tutorial do like and share for more interesting android tutorials.